
Developing Web
Applications
with Google Web Toolkit and OpenRules
Part 1 – Implementing Simple GWT Application

|
|
Developing Web
Applications Part 1 – Implementing Simple GWT Application |
|
Step 1. Installation
Step 2. Create GWT Java Project HelloGWT
Step 3. Create the Hello Composite
Step 4. Create CSS Styles
Step 5. Add Event Handler
Step 8. Deploy on External Tomcat
Step 10. Adding Java Business Objects
Install the Java SDK. If you don't have a recent version of the Java SDK installed, download and install Sun Java Standard Edition SDK.
Install the Eclipse IDE. If you don't have a recent version of the Eclipse installed, download and install from the Eclipse website.
Download Google Web Toolkit. Download the Google Web Toolkit package version 1.4.62 (or higher) for your operating system. Unzip the Google Web Toolkit package, e.g. in the directory C:/GWT/gwt-windows-1.4.62.
Install GWT Designer Plugin. Install the
latest GWT Designer plugin from the
Instantiations website. The simplest way is to download GWT Designer
archive that contains two directories: features and plugins.
Copy their content to the proper directories of your Eclipse. Restart
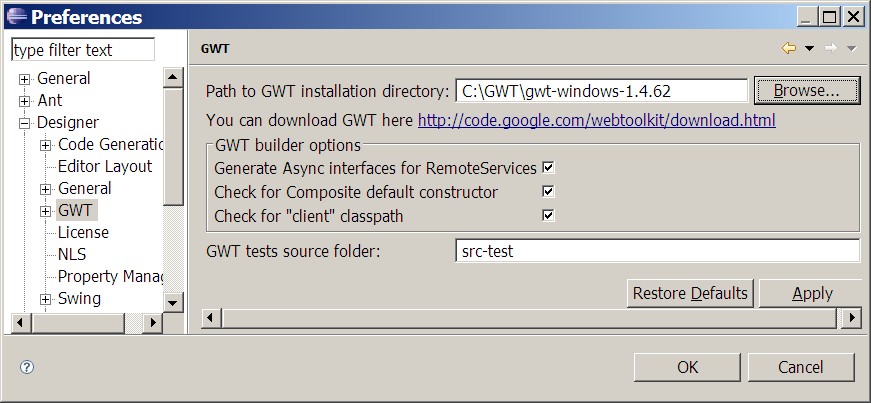
Eclipse and from the menu Window +
Preferences specify the path to your GWT installation directory similar to
this one:
Install the Apache Tomcat. If you don't have a recent version of the Tomcat core installed, download and install it from the Apache website.
Install the OpenRules. If you don't have a recent version of the OpenRules installed, download and install from the OpenRules website.
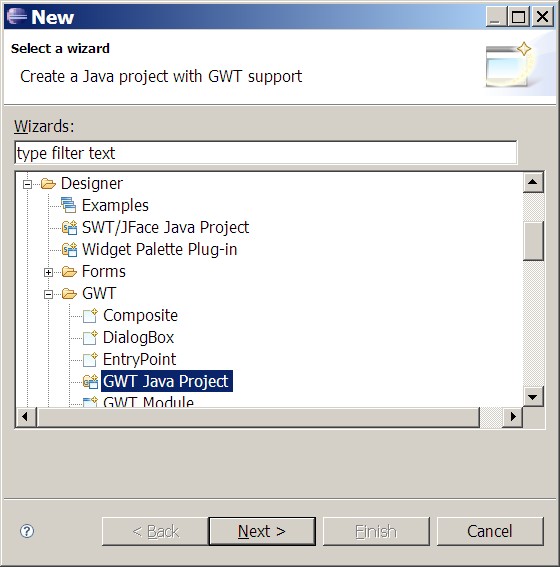
Step 2 – Create GWT Java Project "HelloGWT" ►top
Use Eclipse wizard to create a new GWT Java project as below:
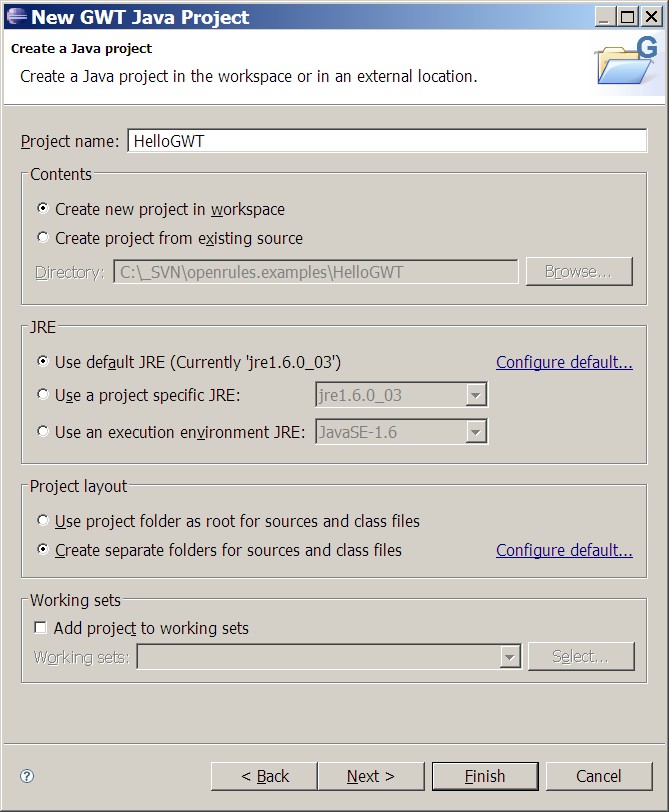
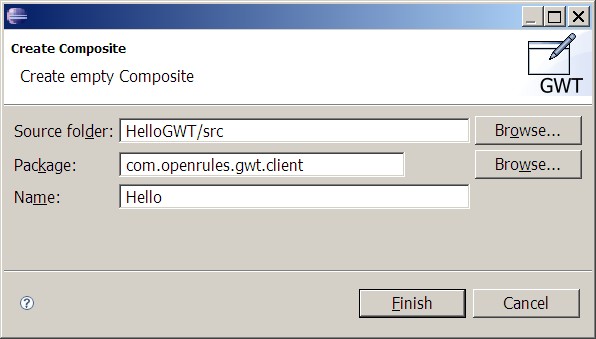
Name the project "HelloGWT":
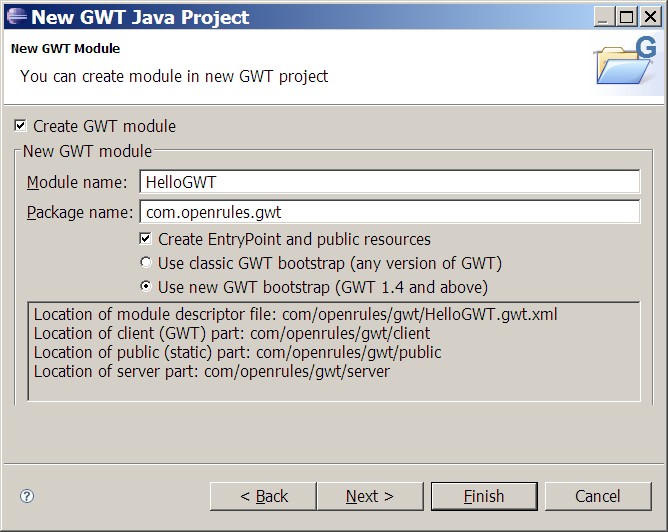
Create GWT module with the name "HelloGWT" and the package "com.openrules.gwt":
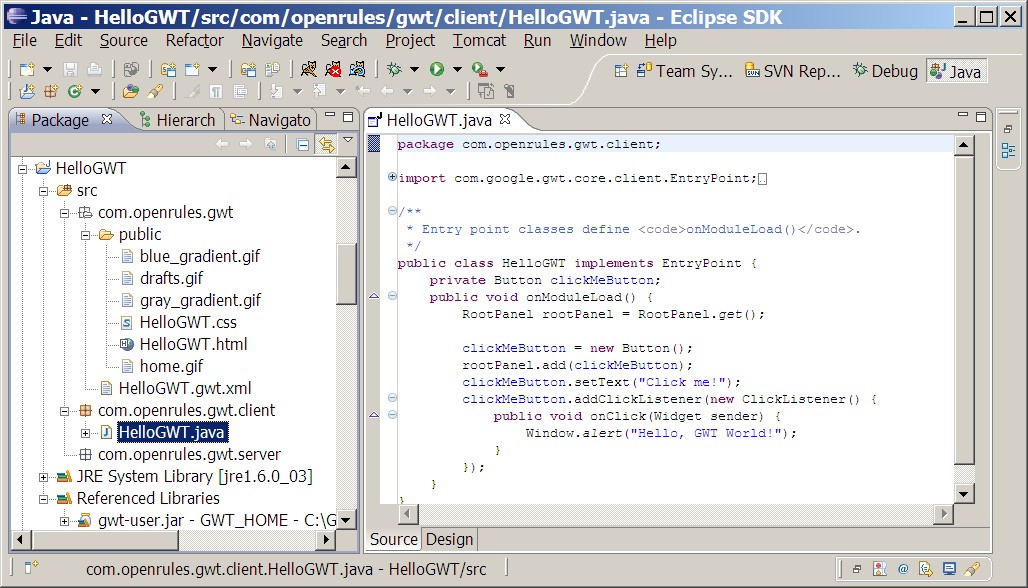
The generated project with all of the necessary configuration and resource files will look like below at Eclipse Package Explorer:
Step 3 – Create the Hello Composite ►top
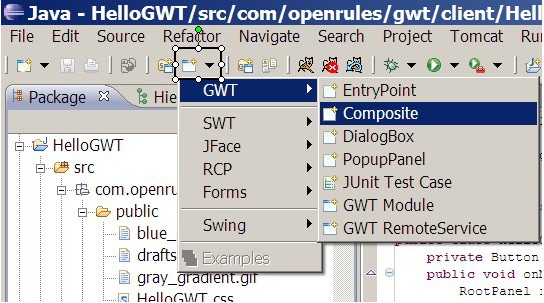
Select the Designer toolbar button and select GWT > Composite from the pull-down menu:
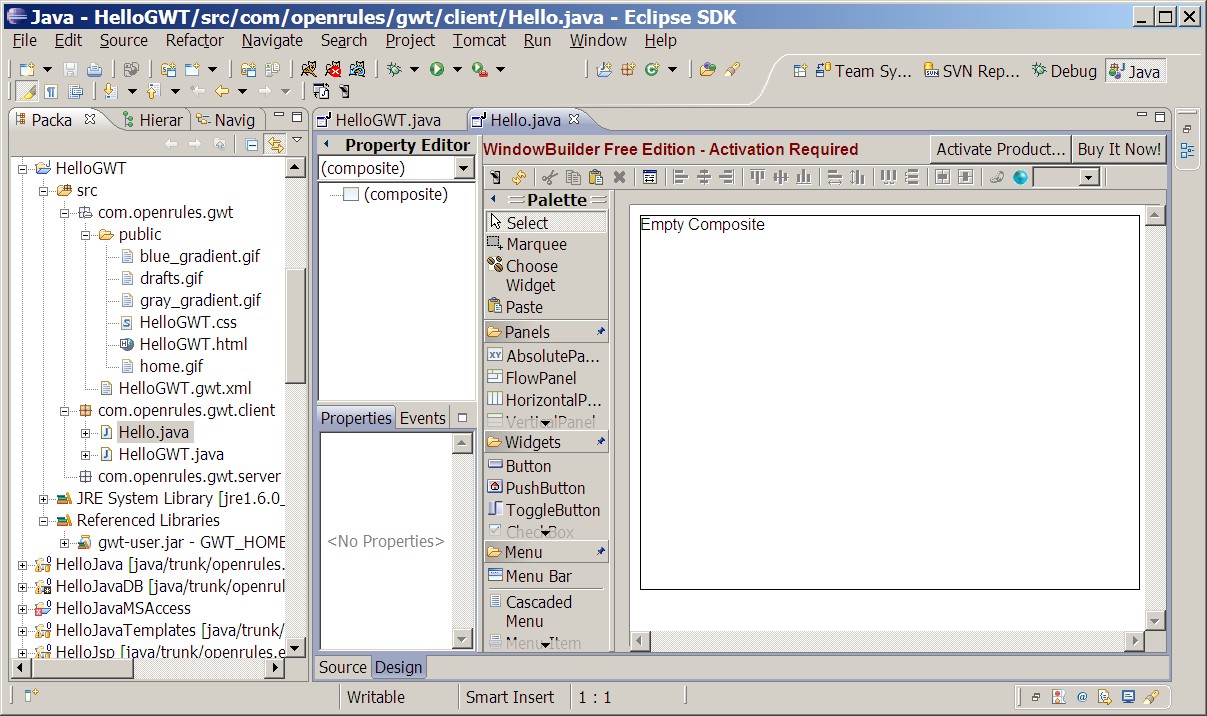
In the Hello.java view switch from the Source to the Design mode and you will see the empty Hello composite:
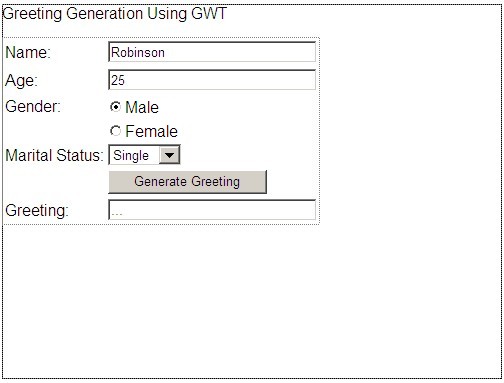
The GWT Designer provides a good tutorial that was customized for our sample. Use the GWT Designer graphical editor to add the following graphical elements (widgets) to the Hello composite:
Select the VerticalPanel from the Palette and click on the Empty Composite
Select Label from the Palette and add it to the content area. On the Properties tab, set the text property to Greeting Generation Usng GWT
Select FlexTable under Panels within the Palette and add it to the Composite inside the VerticalPanel
Add a Label to the FlexTable and change the text property to Name:
Add a TextBox on the right of the label "Name:" inside the FlexTable. Change the variable property to textBoxName and the text property to Robinson
Add a Label under Name and change the text property to Age:
Add a TextBox on the right of the label "Age:". Change the variable property to textBoxAge and the text property to 25
Add a Label under Age and change the text property to Gender:
Add a RadioButton on the right of the label "Gender:". Change the variable property to maleRadioButton, the text property to Male, and the checked property to true.
Add a RadioButton under the "Male". Change the variable property to femaleRadioButton and the text property to Female
Add a Label under Gender and change the text property to Marital Status:
Add a ComboBox on the right of the "Marital Status:". Change the variable property to listBoxMaritalStatus and the items property to [Single,Married]. Change the selectedIndex property to 1.
Add a Button under the combobox "listBoxMaritalStatus". Change the button text property to Generate Greeting.
Add a Label under the button and change the text property to Greeting:
Add a TextBox on the right of the label Greeting:. Change the variable property to textBoxGeneratedGreeting. Change the readOnly property to true.
Save your work in Hello.java.
Your composite will look like below:
Right-click inside the composite and select Test/Preview.. to test you graphics.
Step 4 – Create CSS Styles ►top
Select one of the labels and click on the
ellipsis on the styleName property. That
brings up the CSS Style Selection dialog.
Click on the Add... button. On the
New rule dialog, click
OK. A new css class is added called
.gwt-Label. With the .gwt-Label selected,
click the Edit... button. Choose styles
like below:
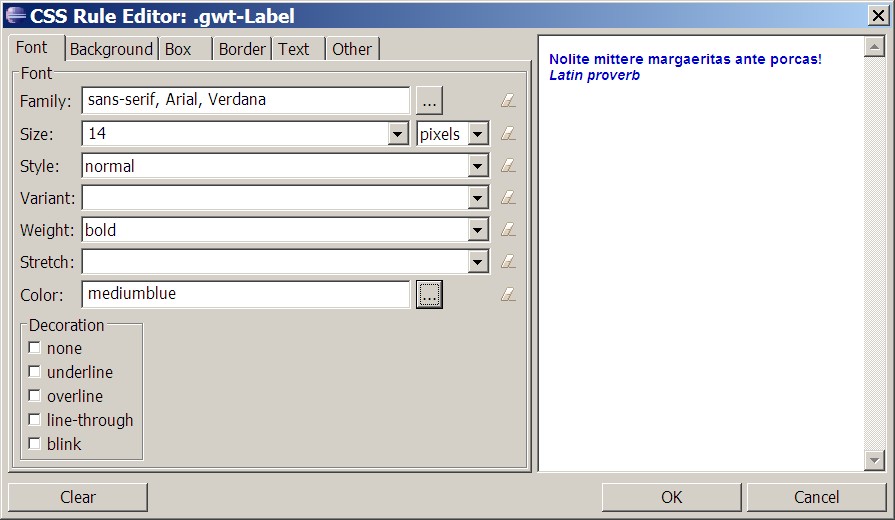
Click OKs and the generated css styles will be saved in the HelloGWTManager.css file in your public folder. Make sure to Save your work.
Select the top label and similarly create its own css style using size 16 and color Red. Now if you Test/Preview your composite you will see:
Step 5 –
Add Event Handler for the Button "Generate Greeting"
►top
Right-click the Generate Greeting button. Select Add event handler > click > onClick. The Designer switched to Source view. As you can see a ClickListener has been added. Now you have to add a snippet of Java code that implements the onClick event. Move the addClickListener at the end of the method Hello() and add a line that assigns a fixed text to the GeneratedGreeting:
| HelloGWT/src/com/openrules/gwt/client/Hello.java |
|
... generateGreetingButton.addClickListener(new ClickListener() { public void onClick(final Widget sender) { /* * Manually added code */ textBoxGeneratedGreeting.setText("HELLO - just a test"); } }); .... |
This code will be executed when a user clicks on the button "Generate Greeting".
Step 6 – Add the Hello Composite to the HelloGWT module ►top
Open the HelloGWT class in Design mode and delete the initially generated Click me! button. You should now see an empty module with the default rootPanel. Do the following:
Add a HorizontalPanel within the rootPanel. Drag the bottom right corner of the HorizontalPanel to make it bigger.
Add a VerticalPanel to the HorizontalPanel.
Select Choose Widget from the Palette. In the Choose Widget dialog, type Hello and click OK.
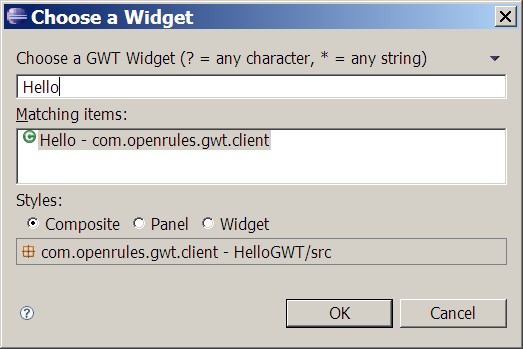
Place the widget in the HelloGWT inside the HorizontalPanel by clicking on it with a "waiting" cursor. The Hello composite will become visible inside HelloGWT module.
Click Save.
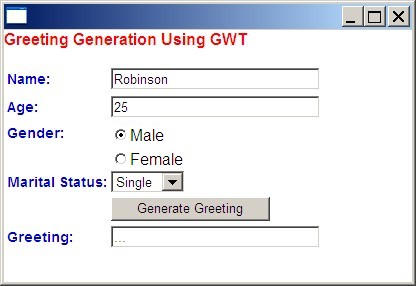
Step 7 – Run HelloGWT Application in Hosted Mode ►top
In the Eclipse Package explorer,
right-click the HelloGWT.java and select
Run As > GWT Application.
This will create a launch configuration and run the application locally.
Click on the Generate Greeting
button.
 |
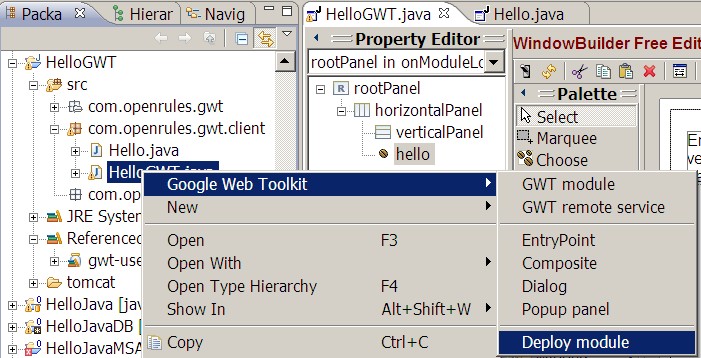
Step 8 – Deploy on External Tomcat ►top
Right click on HelloGWT.java and select Google Web Toolkit > Deploy module:
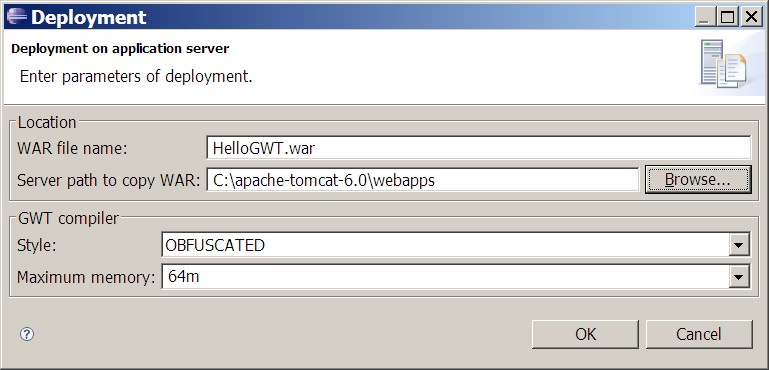
Specify the server deployment options:
WAR file name is the name of your web archive (war) file under which your application will be deployed on your external web server
Server path is the path to your web server, e.g. in the example below we use Tomcat server that was installed in the path C:\apache-tomcat-6.0 and all applications will be deployed into its webapps subdirectory:
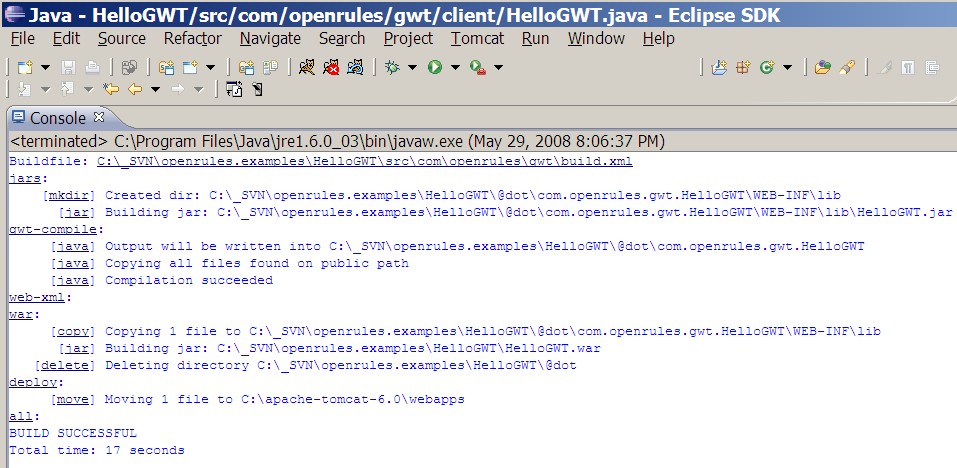
On your Eclipse console you will see the protocol of your deployment similar to this one:
Step 9
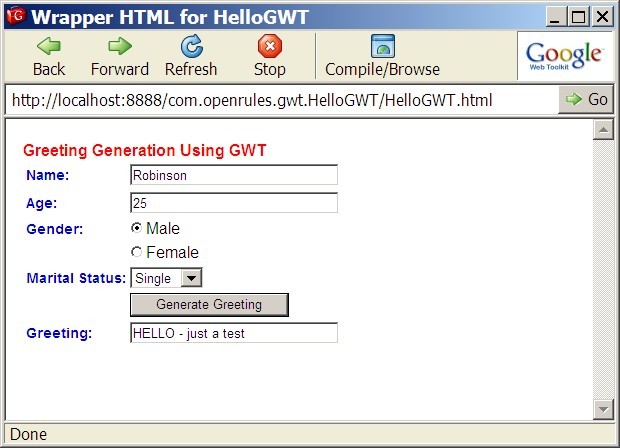
– Run HelloGWT Application in Web Mode
►top
Now you may start/restart your Tomcat server. To run the application deployed on the Tomcat, create a file run.html and place it directly into HelloGWT directory:
| HelloGWT/run.html |
|
<h2> Deployed GWT Application </h2> <h3> http://localhost:8080/HelloGWT/HelloGWT.html</h3> <a href="http://localhost:8080/HelloGWT/HelloGWT.html"> Run</a> |
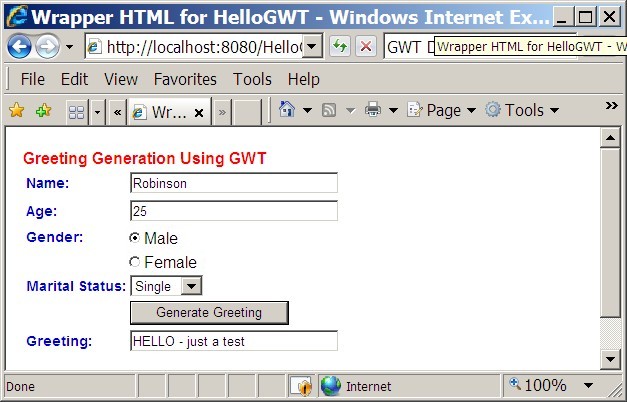
Double-click on the run.html and launch your application in the web mode:
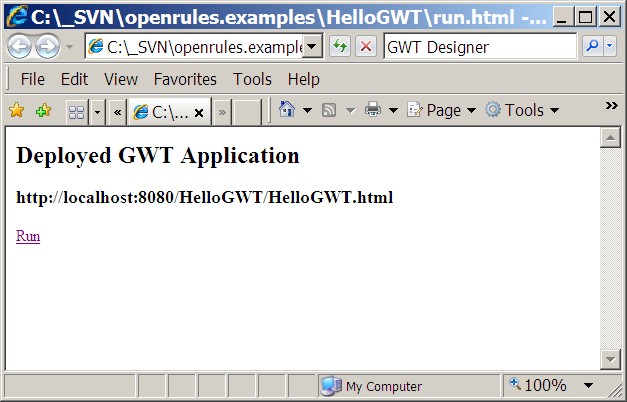
Click on the Run link:
Step 10 –
Adding Java Business Objects
►top
Now we will add the actual business objects to support the real greeting generation. Initially will use Java classes only and later on we will move business logic to OpenRules.
First of all we need an object that describes a customer we plan to greet. Here is the proper Java class:
| HelloGWT/src/com/openrules/gwt/client/Customer.java |
package com.openrules.gwt.client;

public class Customer {
	String name;
	String maritalStatus;
	String gender;
	int age;

	public String getGender() {
		return gender;
	}
	public String getMaritalStatus() {
		return maritalStatus;
	}
	public String getName() {
		return name;
	}
	public void setGender(String string) {
		gender = string;
	}
	public void setMaritalStatus(String string) {
		maritalStatus = string;
	}
	public void setName(String string) {
		name = string;
	}

	public int getAge() {
		return age;
	}
	public void setAge(int age) {
		this.age = age;
	}
}
|
Now we want to create an instance "customer" of the class Customer and do two things when a user clicks on the button "Generate Greeting":
Save (and probably validate) the entered information in the object customer
Define rules according to which we want to generate a customer specific greeting.
To do this we will modify the file Hello.java (only the last section) as follows:
| HelloGWT/src/com/openrules/gwt/client/Hello.java |
|
... final Customer customer = new Customer(); generateGreetingButton.addClickListener(new ClickListener() { public void onClick(final Widget sender) { /* * Manually added code */ //textBoxGeneratedGreeting.setText("HELLO - just a test"); customer.setName(textBoxName.getText()); customer.setAge(Integer.parseInt(textBoxAge.getText())); String gender = (maleRadioButton.isChecked()) ? "Male" : "Female"; customer.setGender(gender); int selectedIndex = listBoxMaritalStatus.getSelectedIndex(); String maritalStatus = listBoxMaritalStatus.getItemText(selectedIndex); customer.setMaritalStatus(maritalStatus); /* * Greeting generation rules */ String salutation = "?"; if (customer.getGender().equals("Male")) salutation = "Mr."; else { if (customer.getMaritalStatus().equals("Single")) salutation = "Ms."; else salutation = "Mrs."; } textBoxGeneratedGreeting.setText("Hello "+salutation+customer.name+"!"); } }); .... |
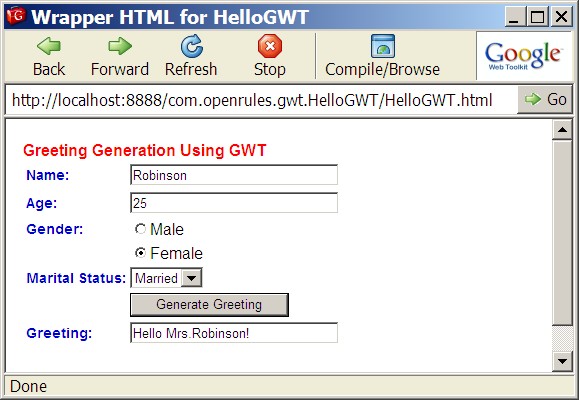
If you run the application now in the host mode it will produce a more
meaningful greeting:
Summary ►top
We created a development environment for GWT.
We setup a simple GWT application that could run in both host and web modes
So far, our application uses only simple greeting rules. But the whole setup works and we are now ready to add real functionality.
Copyright © 2008, OpenRules, Inc.